
Blog chia sẽ kinh nghiệm lập trình và Technical VN. Nơi mà các bạn có thể học tập và tham khảo về những công nghệ mới nhất hiện nay về .NET
Chủ Nhật, 28 tháng 12, 2014
Đa số các chip xử lý (CPU) hiện còn đang hoạt động mà chúng ta biết đến đều có trên hai nhân(lõi) và tính năng ảo hóa - điều này làm cho các máy tính có được tốc độ xử lý nhanh hơn và khả năng đa nhiệm tốt hơn. Chính vì vậy để tận dụng hết khả năng của CPU chúng ta cần xử lý đồng thời trên nhiều lõi CPU cho nhiều bài toán khác nhau để tiết kiệm thời gian và nâng cao hiệu xuất. Trong vấn đề trên và trong lập trình ứng dụng .NET nói riêng chúng ta có thuật ngữ Thread (luồng xử lý/tiểu trình), chúng ta sẽ tìm hiểu về nó trong bài viết này.
Bạn không nên nhầm lẫn giữa process (tiến trình) và thread (tiểu trình). Process có thể hiểu là một instance của chương trình máy tính được thực thi, dựa trên hệ điều hành, hoàn toàn độc lập với các tiến trình khác. Còn thread là một nhóm lệnh được tạo ra để thực thi một tác vụ trong một process, chúng chia sẻ chung dữ liệu với nhau để xử lý, điều này là cần thiết nhưng cũng là nguyên nhân dễ gây ra lỗi nếu bạn không xử lý đúng cách. Các bạn có thể tham khảo về Class Thread tại đây
[caption id="" align="aligncenter" width="735"]
 Mô tả sự tiết kiệm về thời gian[/caption]
Trong nội dung này tôi không nói sâu về Thread trong C#, các bạn có thể tìm hiểm thêm tại đây, tôi sẽ xoay quanh về cách Thread hoạt động với các thành phần của WPF, xong tôi sẽ vẫn nhắc các bạn nhớ về Thread và Cách tạo một Thread như sau
[code language="csharp"]
public void CreateThread()
{
Thread thread = new Thread(new ThreadStart(MethodJob));
//MethodJob có thể là một delegate
//Run thread
thread.Start();
//Buộc hoãn thực thi đến khi được phép
thread.Suspend();
//Gọi thread tiếp tục chạy
thread.Resume();
//Buộc thread phải dừng
thread.Abort();
//Đợi thread xử lý xong
thread.Join();
}
private void MethodJob()
{
for (int i = 0; i < 100; i++)
{
//Do something
}
}
[/code]
Vấn đề Thread trong WPF - Truy cập an toàn một Control
Trong winform, một Thread phụ được tạo ra không thể tự mình truy cặp được các Control của Thread chính một cách an toàn được, chúng ta sẽ phải dùng delegate, trong WPF cũng thế; Nhưng trong WPF, mỗi Control đều chứa một đối tượng là Dispatcher - đối tượng này giúp đồng bộ các truy cập đến Control hiện tại và tránh sảy ra lỗi(tương tực việc lock(object)). Vì vậy, khi muốn thực hiện một truy cập an toàn đến một Control bất kỳ chúng ta cần gọi Dispatcher của control đó và phương thức xử lý Invoke(delegate), phương thức này chứa một delegate để làm việc với các thuộc tính của Control.
Ví dụ dưới đây phục vụ nhu cầu đếm lần lược từ 0->99 và hiện số đó lên TextBox
[code language="csharp"]
private void BtnRun_OnClick(object sender, RoutedEventArgs e)
{
//thread là một biến toàn cục kiểu Thread
if (thread != null)
{
thread.Abort(); //Dừng công viện hiện tại
}
//delegate được tạo theo định nghĩa Lambeda
thread = new Thread(new ThreadStart(() =>
{
//nội dung delegate
for (int i = 0; i < 100; i++)
{
Thread.Sleep(1000);
//An toàn truy cập với Dispatcher
txtData.Dispatcher.Invoke(() => txtData.Text = i.ToString());
//Vùng giới hạn an toàn rộng hơn
//this.Dispatcher.Invoke(() => txtData.Text = i.ToString());
}
}));
thread.IsBackground = true;
thread.Start();
}
[/code]
Ví dụ dưới đây phục vụ nhu cầu đếm lần lược từ x->99 và hiện số đó lên TextBox, với x là một số được truyền vào, tôi truyền vào số 10. Lưu ý tôi có hai delegate(Counter,Counters) chịu trách nhiệm hiển thị số đếm lên TextBox nhưng chúng có cách hiển thị khác nhau, các bạn hãy chú ý về cách truyền đối số cho Thread và hai delegate. Tôi gọi phương thức Invoke(delegate, object[]).
[code language="csharp"]
private void BtnRun2_OnClick(object sender, RoutedEventArgs e)
{
if (thread2 != null)
{
thread2.Abort();
}
thread2 = new Thread(new ParameterizedThreadStart(Run2));
thread2.IsBackground = true;
thread2.Start(10);
}
private delegate void Counter(int num);
private delegate void Counters(int num,int limit);
private void Run2(object numStart)
{
for (int i = (int)numStart; i < 100; i++)
{
//Cách truyền một tham số
this.Dispatcher.Invoke(new Counter(StartCount), i);
//Cách truyền nhiều tham số
this.Dispatcher.Invoke(new Counters(StartCounts), new object[] {i, 40});
Thread.Sleep(800);
}
}
private void StartCount(int num)
{
if (num < 20)
{
txtData2.Text = num.ToString();
}
else
{
txtData2.Text = "---";
}
}
private void StartCounts(int num,int limit)
{
if (num > 30 && num < limit)
{
txtData2.Text = num.ToString();
}
}
[/code]
Vấn đề Thread trong WPF - Show một Window từ Thread phụ
Nếu nhu cầu là một thread phụ được tạo ra để thực hiện một công việc nào đó và trong đó cần Show một Window thì bạn sẽ làm thế nào. Nếu bạn có thói quen dùng delegate như đoạn code bênh dưới chắc chắn rằng bạn sẽ gặp lỗi "The calling thread must be STA, because many UI components require this."
[code language="csharp"]
private void BtnRun4_OnClick(object sender, RoutedEventArgs e)
{
Thread thread5 = new Thread(new ThreadStart(ShowSubForm));
thread5.IsBackground = true;
thread5.Start();
}
private void ShowSubForm()
{
new MainWindow().Show();
}
[/code]
Vậy ta khắc phục lỗi trên như sau, cần tạo ra một Thread STA
[code language="csharp"]
private void BtnRun4_OnClick(object sender, RoutedEventArgs e)
{
Thread thread5 = new Thread(new ThreadStart(ShowSubForm));
thread5.SetApartmentState(ApartmentState.STA);
thread5.IsBackground = true;
thread5.Start();
}
private void ShowSubForm()
{
new MainWindow().Show();
//Nói rằng đây là một Window độc lập
System.Windows.Threading.Dispatcher.Run();
}
[/code]
Chúng ta còn cách khác đơn giản hơn với Dispathcher, bạn hảy thử
[code language="csharp"]
private void BtnRun4_OnClick(object sender, RoutedEventArgs e)
{
Thread thread5 = new Thread(new ThreadStart(ShowSubForm));
thread5.IsBackground = true;
thread5.Start();
}
private void ShowSubForm()
{
this.Dispatcher.Invoke(() =>
{
new MainWindow().Show();
});
}
[/code]
Vậy là chúng ta đã biết thêm về các vấn đề về Thread trong WPF, các bạn có thể tham khảo SourceCode
Chúc các bạn thành công!
Phạm Tuân
Thứ Bảy, 27 tháng 12, 2014
Ở phần trước tôi đã giới thiệu sơ qua cách hình thành một Modern UI căng bản cho ứng dụng WPF, bài tiếp theo này tôi sẽ hướng dẫn chi tiết để chúng ta có một GUI đẹp mắt và chuyên nghiệp hơn. Đồng thời tôt cũng nói về cách thêm mới và dùng Extensions trong bộ công cụ Visual Studio(VS).
Mục đích cần nắm trong bài này là:
- Cách thêm và dùng một Extensions mà ở đây sẽ là Modern UI For WPF Extension
- Cách tạo một ứng dụng với Modern UI có chức năng cơ bản như thay đổi Theme và các trang hiển thị
- Biết cách Costum theme cho cá nhân custom.
I> Thêm Modern UI For WPF Extension
Extension là một công cụ giúp chúng ta tải về một Eample để tham khảo hoặc một Template cho việc Design hay một Add-On... Chúng ta tiến tải về một số Template của Modern UI như sau: Mở VS và vào menu TOOL -> Extensions and Updates
[caption id="" align="aligncenter" width="399"]
 Chọn Extension and ...[/caption]
Một hợp thoại hiện ra ta chọn mục Online để tiến hành quét, Nhập vào khung Search từ "modern ui", vô số các Extensions hiện ra để chúng ta Download và cài đặt(VS sẽ tự động cài đặt và Add vào bảng New Project) hãy chọn Modern UI For WPF Templates và Download sau đó chọn Install

II> Tạo một Project với tùy chọn cơ bản
Tiếp đến chúng te sẽ new một Project, chú ý rằng hãy chọn như hình dưới để thấy được Template vừa mới Install
Có hai tùy chọn cho Project Modern UI, bạn có thể chọn một trong hai, tôi sẽ chọn mục thứ hai WPF Navigation Application vì nó đầy đủ nhất. OK bây giờ bạn thử Run ứng dụng của mình xem sao.


Việc tiếp theo là thử thêm một trang hiển thị vào MainWindow, Chọn Project -> Add -> New Item khi hộp thoại mở ra chọn mục Modern UI for WPF từ bảng bênh trái, ở bảng giữ chọn Tamplate nào bạn muốn, tôi chọn List Page và đặt tên là ListPage1.xaml.
Tiến hành Add trang này vào MainWindow bằng cách trỏ đường dẫn đến trang này tại thẻ Link, chú ý thuộc tính ContentSource, là đường dẫn đến trang mà bạn muốn gọi đầu tiên; LogoData là hình mặt cười trên GUI và nó được Draw bằng Path.

[code language="xml"]
<mui:ModernWindow x:Class="ModernUIs.MainWindow"
xmlns="http://schemas.microsoft.com/winfx/2006/xaml/presentation"
xmlns:x="http://schemas.microsoft.com/winfx/2006/xaml"
xmlns:mui="http://firstfloorsoftware.com/ModernUI"
Title="mui" IsTitleVisible="True"
LogoData="F1 M 24.9015,43.0378L 25.0963,43.4298C 26.1685,49.5853 31.5377,54.2651 38,54.2651C 44.4623,54.2651 49.8315,49.5854 50.9037,43.4299L 51.0985,43.0379C 51.0985,40.7643 52.6921,39.2955 54.9656,39.2955C 56.9428,39.2955 58.1863,41.1792 58.5833,43.0379C 57.6384,52.7654 47.9756,61.75 38,61.75C 28.0244,61.75 18.3616,52.7654 17.4167,43.0378C 17.8137,41.1792 19.0572,39.2954 21.0344,39.2954C 23.3079,39.2954 24.9015,40.7643 24.9015,43.0378 Z M 26.7727,20.5833C 29.8731,20.5833 32.3864,23.0966 32.3864,26.197C 32.3864,29.2973 29.8731,31.8106 26.7727,31.8106C 23.6724,31.8106 21.1591,29.2973 21.1591,26.197C 21.1591,23.0966 23.6724,20.5833 26.7727,20.5833 Z M 49.2273,20.5833C 52.3276,20.5833 54.8409,23.0966 54.8409,26.197C 54.8409,29.2973 52.3276,31.8106 49.2273,31.8106C 46.127,31.8106 43.6136,29.2973 43.6136,26.197C 43.6136,23.0966 46.127,20.5833 49.2273,20.5833 Z"
ContentSource="/ListPage1.xaml">
<mui:ModernWindow.MenuLinkGroups>
<mui:LinkGroup DisplayName="welcome">
<mui:LinkGroup.Links>
<mui:Link DisplayName="Cuộc sống" Source="/ListPage1.xaml" />
</mui:LinkGroup.Links>
</mui:LinkGroup>
<mui:LinkGroup DisplayName="settings" GroupKey="settings">
<mui:LinkGroup.Links>
<mui:Link DisplayName="software" Source="/Pages/SettingsPage.xaml" />
</mui:LinkGroup.Links>
</mui:LinkGroup>
</mui:ModernWindow.MenuLinkGroups>
<mui:ModernWindow.TitleLinks>
<mui:Link DisplayName="settings" Source="/Pages/SettingsPage.xaml" />
<mui:Link DisplayName="help" Source="http://mui.codeplex.com" />
</mui:ModernWindow.TitleLinks>
</mui:ModernWindow>
[/code]
Kết quả tôi nhận được

III> Costum Theme
Sau đây là bảng Theme resources đang được sử dụng, chúng ta sẽ thay đổi theo ý mình về màu sắc cho các Control nhưng phải tuân thủ theo Key sau đây, chú ý khi modify Resource phải đúng kiểu dữ liệu.
| Resource | Type | Light default | Dark default |
|---|---|---|---|
| ButtonBackground | Brush | #FFFFFFFF | #FF333333 |
| ButtonBackgroundHover | Brush | #FFDDDDDD | #FF3E3E42 |
| ButtonBackgroundPressed | Brush | {AccentColor} | {AccentColor} |
| ButtonBorder | Brush | #FFCCCCCC | #FF333333 |
| ButtonBorderHover | Brush | #FFCCCCCC | #FF3E3E42 |
| ButtonBorderPressed | Brush | {AccentColor} | {AccentColor} |
| ButtonText | Brush | #FF333333 | #FFD1D1D1 |
| ButtonTextDisabled | Brush | #FFA1A1A1 | #FF515151 |
| ButtonTextHover | Brush | #FF333333 | #FFD1D1D1 |
| ButtonTextPressed | Brush | #FFFFFFFF | #FFD1D1D1 |
| DataGridBackground | Brush | #00FFFFFF | #00FFFFFF |
| DataGridCellBackground | Brush | #00FFFFFF | #00FFFFFF |
| DataGridCellBackgroundHover | Brush | #FFDDDDDD | #FF3E3E42 |
| DataGridCellBackgroundSelected | Brush | {AccentColor} | {AccentColor} |
| DataGridCellForeground | Brush | #FF333333 | #FFD1D1D1 |
| DataGridCellForegroundHover | Brush | #FF333333 | #FFD1D1D1 |
| DataGridCellForegroundSelected | Brush | #FFFFFFFF | #FFD1D1D1 |
| DataGridDropSeparator | Brush | {AccentColor} | {AccentColor} |
| DataGridForeground | Brush | #FF333333 | #FFD1D1D1 |
| DataGridGridLines | Brush | #FFCCCCCC | #FF333333 |
| DataGridHeaderBackground | Brush | #00FFFFFF | #00FFFFFF |
| DataGridHeaderBackgroundHover | Brush | #FFDDDDDD | #FF3E3E42 |
| DataGridHeaderBackgroundPressed | Brush | {AccentColor} | {AccentColor} |
| DataGridHeaderBackgroundSelected | Brush | {AccentColor} | {AccentColor} |
| DataGridHeaderForeground | Brush | #FF333333 | #FFD1D1D1 |
| DataGridHeaderForegroundHover | Brush | #FF333333 | #FFD1D1D1 |
| DataGridHeaderForegroundPressed | Brush | #FFFFFFFF | #FFD1D1D1 |
| DataGridHeaderForegroundSelected | Brush | #FFFFFFFF | #FFD1D1D1 |
| Hyperlink | Brush | {AccentColor} | {AccentColor} |
| HyperlinkDisabled | Brush | #FF919191 | #FF717171 |
| HyperlinkHover | Brush | {AccentColor} | {AccentColor} |
| InputBackground | Brush | #FFFFFFFF | #FF333333 |
| InputBackgroundHover | Brush | #FFFFFFFF | #FF3E3E42 |
| InputBorder | Brush | #FFCCCCCC | #FF333333 |
| InputBorderHover | Brush | #FFCCCCCC | #FF3E3E42 |
| InputText | Brush | #FF333333 | #FFD1D1D1 |
| InputTextDisabled | Brush | #FF919191 | #FF717171 |
| InputTextHover | Brush | #FF333333 | #FFD1D1D1 |
| ItemBackgroundHover | Brush | #FFDDDDDD | #FF3E3E42 |
| ItemBackgroundSelected | Brush | {AccentColor} | {AccentColor} |
| ItemBorder | Brush | #FFCCCCCC | #FF3E3E42 |
| ItemText | Brush | #FF333333 | #FFD1D1D1 |
| ItemTextDisabled | Brush | #FF919191 | #FF717171 |
| ItemTextHover | Brush | #FF333333 | #FFD1D1D1 |
| ItemTextSelected | Brush | #FFFFFFFF | #FFD1D1D1 |
| LinkButtonText | Brush | #FF717171 | #FF717171 |
| LinkButtonTextDisabled | Brush | #FF919191 | #FF515151 |
| LinkButtonTextHover | Brush | #FF333333 | #FFD1D1D1 |
| LinkButtonTextPressed | Brush | #FF919191 | #FF515151 |
| MenuText | Brush | #66000000 | #FF515151 |
| MenuTextHover | Brush | #BB000000 | #FF919191 |
| MenuTextSelected | Brush | #FF333333 | #FFD1D1D1 |
| ModernButtonBorder | Brush | #FF919191 | #FF919191 |
| ModernButtonBorderDisabled | Brush | #FF919191 | #FF515151 |
| ModernButtonBorderHover | Brush | #FF333333 | #FFD1D1D1 |
| ModernButtonBorderPressed | Brush | #FF333333 | #FFD1D1D1 |
| ModernButtonIconBackgroundPressed | Brush | {AccentColor} | {AccentColor} |
| ModernButtonIconForegroundPressed | Brush | #FFFFFFFF | #FFD1D1D1 |
| ModernButtonText | Brush | #FF333333 | #FFD1D1D1 |
| ModernButtonTextDisabled | Brush | #FFA1A1A1 | #FF515151 |
| ModernButtonTextHover | Brush | #FF333333 | #FFD1D1D1 |
| ModernButtonTextPressed | Brush | #FF333333 | #FFD1D1D1 |
| PopupBackground | Brush | #FFFFFFFF | #FF252526 |
| ProgressBackground | Brush | #FFDDDDDD | #FF333333 |
| ScrollBarBackground | Brush | #00FFFFFF | #FF333333 |
| ScrollBarThumbBackground | Brush | #00FFFFFF | #00FFFFFF |
| ScrollBarThumbBackgroundDragging | Brush | #FFCCCCCC | #00FFFFFF |
| ScrollBarThumbBackgroundHover | Brush | #FFDDDDDD | #00FFFFFF |
| ScrollBarThumbBorder | Brush | #FFCCCCCC | #FF333333 |
| ScrollBarThumbForeground | Brush | #00FFFFFF | #FF717171 |
| ScrollBarThumbForegroundDragging | Brush | #00FFFFFF | #FFD1D1D1 |
| ScrollBarThumbForegroundHover | Brush | #00FFFFFF | #FF919191 |
| SeparatorBackground | Brush | #FFCCCCCC | #FF3E3E42 |
| SliderSelectionBackground | Brush | {AccentColor} | {AccentColor} |
| SliderSelectionBorder | Brush | {AccentColor} | {AccentColor} |
| SliderThumbBackground | Brush | #FFFFFFFF | #FF717171 |
| SliderThumbBackgroundDisabled | Brush | #FFCCCCCC | #FF333333 |
| SliderThumbBackgroundDragging | Brush | {AccentColor} | {AccentColor} |
| SliderThumbBackgroundHover | Brush | #FFDDDDDD | #FF919191 |
| SliderThumbBorder | Brush | #FFCCCCCC | #FF717171 |
| SliderThumbBorderDisabled | Brush | #FFCCCCCC | #FF333333 |
| SliderThumbBorderDragging | Brush | {AccentColor} | {AccentColor} |
| SliderThumbBorderHover | Brush | #FFCCCCCC | #FF919191 |
| SliderTick | Brush | #FF919191 | #FF717171 |
| SliderTickDisabled | Brush | #FFCCCCCC | #FF333333 |
| SliderTrackBackground | Brush | #FFCCCCCC | #FF333333 |
| SliderTrackBorder | Brush | #FFCCCCCC | #FF333333 |
| SubMenuText | Brush | #99000000 | #FF717171 |
| SubMenuTextHover | Brush | #66000000 | #FF515151 |
| SubMenuTextSelected | Brush | #FF333333 | #FFD1D1D1 |
| WindowBackground | Brush | #FFFFFFFF | #FF252526 |
| WindowBackgroundColor | Color | #FFFFFFFF | #FF252526 |
| WindowBackgroundContent | UIElement | Rectangle | Rectangle |
| WindowBorder | Brush | {AccentColor} | {AccentColor} |
| WindowBorderActive | Brush | {AccentColor} | {AccentColor} |
| WindowHeaderGradient | Brush | LinearGradientBrush | #00FFFFFF |
| WindowText | Brush | #FF333333 | #FFC1C1C1 |
| WindowTextReadOnly | Brush | #FF919191 | #FF717171 |
Tôi sẽ thử Costum lại màu nền của thẻ Link thành màu Đỏ cho Theme Light với Key như bảng trên là ItemBackgroundSelected. Tôi mở file App.xaml và thêm vào một dòng.
[code language="xml"]
<Application x:Class="ModernUIs.App"
xmlns="http://schemas.microsoft.com/winfx/2006/xaml/presentation"
xmlns:x="http://schemas.microsoft.com/winfx/2006/xaml"
StartupUri="MainWindow.xaml">
<Application.Resources>
<ResourceDictionary>
<ResourceDictionary.MergedDictionaries>
<ResourceDictionary Source="/FirstFloor.ModernUI;component/Assets/ModernUI.xaml" />
<ResourceDictionary Source="/FirstFloor.ModernUI;component/Assets/ModernUI.Light.xaml"/>
</ResourceDictionary.MergedDictionaries>
<!--Phần tôi thêm vào bênh dưới-->
<SolidColorBrush x:Key="ItemBackgroundSelected" Color="Red" />
<!--Phần tôi thêm vào bênh trên-->
</ResourceDictionary>
</Application.Resources>
</Application>
[/code]
Kết quả tôi có thế này

Phạm Tuân
Thứ Sáu, 26 tháng 12, 2014
Chào các bạn, hôm nay tôi sẽ giới thiệu với mọi người về một trong những thư viện mã nguồn mở giúp thiết kế một giao diện Metro - Modern UI trên WPF. Tôi sẽ nói cách đơn giản nhất để cho ra một ứng dụng đẹp mắt và hiện đại.
Thư viện mã nguồn mở tôi sẽ giới thiệu trong nội dung này là Modern UI for WPF, một thư viện giúp thiết kế một giao diện đơn giản mà hiện đại
[caption id="" align="aligncenter" width="800"]
 Phạm Tuân[/caption]
Tôi sẽ hướng dẫn các bạn làm một giao diện như trên. Trước tiên chúng ta sẽ phải tạo mới một Project WPF và tải thư viện này về (link ở cuối bài) sau đó add Reference, có cách đơn giản hơn đó là dùng NUGET đa phần là có sẵn trong bộ Visual Studio nếu không chúng ta có thể cài đặt (Chú ý nếu dùng Nuget vẫn phải tạo mới một project trước). Cách dùng như sau; Vào menu TOOL -> Nuget Package Manager -> Package Manager Console
[caption id="" align="aligncenter" width="500"]
 Phạm Tuân[/caption]
Trên cửa sổ VS sẽ xuất hiện khung Nuget như bên dưới, chúng ta sẽ dán đoạn code này và nhấn Enter, đợi để Nuget tiến hành tải về gói Package và tự Add Reference cho chúng ta.
[code language="php"]Install-Package ModernUI.WPF[/code]
[caption id="" align="aligncenter" width="483"]
 Phạm Tuân[/caption]
Thế là xong phần thư viện, khi tạo mới một project chúng ta có sẵn một Window - chúng ta sẽ thay toàn bộ code XAML đang có bằng đoạn XAML sau (Chú ý x:Class="ModernUI.MainWindow" là như cũ)
[code language="xml"]
<mui:ModernWindow x:Class="ModernUI.MainWindow"
xmlns="http://schemas.microsoft.com/winfx/2006/xaml/presentation"
xmlns:x="http://schemas.microsoft.com/winfx/2006/xaml"
xmlns:mui="http://firstfloorsoftware.com/ModernUI"
Title="MainWindow" Height="350" Width="525">
</mui:ModernWindow>
[/code]
Ngoài ra còn phải change trong file *.cs, class MainWindow phải kế thừa từ class ModernWindow
[code language="csharp"]
public partial class MainWindow : ModernWindow
{
public MainWindow()
{
InitializeComponent();
}
}
[/code]
Dừng lại ở đó chúng ta chỉ mới có được phần Windows khá đơn giản, tiếp đến thêm đoan code sau vào giữa thẻ </mui:ModernWindow>
[code language="xml"]
<mui:ModernWindow x:Class="ModernUI.MainWindow"
xmlns="http://schemas.microsoft.com/winfx/2006/xaml/presentation"
xmlns:x="http://schemas.microsoft.com/winfx/2006/xaml"
xmlns:mui="http://firstfloorsoftware.com/ModernUI"
Title="MainWindow" Height="350" Width="525" ContentSource="UserControl1.xaml">
<!--Phần Link trỏ đến nguồn (UserControl,Page..)-->
<mui:ModernWindow.MenuLinkGroups>
<mui:LinkGroup DisplayName="group 1" >
<mui:LinkGroup.Links>
<mui:Link DisplayName="link 1" Source="UserControl1.xaml"/>
<mui:Link DisplayName="link 2" Source="Page1.xaml"/>
<mui:Link DisplayName="link 3" />
</mui:LinkGroup.Links>
</mui:LinkGroup>
</mui:ModernWindow.MenuLinkGroups>
</mui:ModernWindow>
[/code]
Tiếp tục đến phần Theme, chúng ta mở file App.xaml và thêm đoạn code này vào
[code language="xml"]
<Application.Resources>
<ResourceDictionary>
<ResourceDictionary.MergedDictionaries>
<ResourceDictionary Source="/FirstFloor.ModernUI;component/Assets/ModernUI.xaml" />
<ResourceDictionary Source="/FirstFloor.ModernUI;component/Assets/ModernUI.Light.xaml"/>
</ResourceDictionary.MergedDictionaries>
</ResourceDictionary>
</Application.Resources>
[/code]
Chú ý thẻ <mui:Link DisplayName="Tên hiển thị" Source="UI_cần_hiển_thị.XAML"/>, và kết quả là
[caption id="" align="aligncenter" width="525"]
 Phạm Tuân[/caption]
Các bạn có thể tham khảo và download SourceCode, thư viện tại đây, Nuget và dĩ nhiên sẽ cần bộ Icon Ui này
Hãy đón xem phần sau tại đây, tôi sẽ hướng dẫn chi tiết hơn để có một giao diện hoàn thiện như thế này
[caption id="" align="aligncenter" width="556"]
 Phạm Tuân[/caption]
[caption id="" align="aligncenter" width="556"]
 Phạm Tuân[/caption]
Chúc các bạn thành công!
Phạm Tuân
Thứ Năm, 25 tháng 12, 2014
Ở phần trước chúng ta đã biết về Validation với Interface IDataErrorInfo, ở phần này tôi sẽ nói về phần còn lại của Validation đó là ValidationRule. Hiểu nôm na đó là cách tạo một tập các điều luật quy định việc nhập liệu của người dùng (có thể là miền giá trị cho phép ở ví dụ dưới)
Tôi tiếp tục lấy ví dụ ở phần trước và chỉ thêm mới lớp PersionalRules. chúng ta đã tìm hiểu về interface IDataErrorInfo, bây giờ chúng ta tìm hiểu về class ValidationRule, lớp này có duy nhất một hàm thành viên
[code language="csharp"]
public override ValidationResult Validate(object value,
System.Globalization.CultureInfo cultureInfo){}
[/code]
Tôi tiếp tục thêm vào class PersionalRules hai thuộc tính đó là Min và Max đại diện cho miền giá trị về tuổi (Min < x < Max), tôi override phương thức Validate và tôi nhận được kết quả
[code language="csharp"]
class PersionalRules : ValidationRule
{
public int Min { set; get; }
public int Max { set; get; }
public override ValidationResult Validate(object value, System.Globalization.CultureInfo cultureInfo)
{
int YearOld = 0;
try
{
if (((string)value).Length > 0)
YearOld = Int32.Parse((String)value);
}
catch (Exception e)
{
return new ValidationResult(false, "Giá trị nhập vào không phải là số" + e.Message);
}
if ((YearOld < Min) || (YearOld > Max))
{
return new ValidationResult(false,
"Độ tuổi vượt quá giới hạn cho phép " + Min + " - " + Max + ".");
}
else
{
//Tất cả đều hợp lệ
return new ValidationResult(true, null);
}
}
}
[/code]
Quay lại phần GUI(giao diện) chúng ta dùng lại ví dụ trước và thêm thế này (chú ý là chỉ thêm một dòng "xmlns:Rules="clr-namespace:Validation" thôi ở thẻ Window)
[code language="xml"]
<Window x:Class="Validation.MainWindow"
xmlns="http://schemas.microsoft.com/winfx/2006/xaml/presentation"
xmlns:x="http://schemas.microsoft.com/winfx/2006/xaml"
xmlns:Rules="clr-namespace:Validation" <!--Namespace chứa class PersionalRules-->
Title="MainWindow" Height="250" Width="525">
[/code]
Tiếp theo đến thẻ TextBox của tuổi chúng ta thay bằng thẻ TextBox mới như sau(Chú ý thẻ được thêm vào và xóa property Text của thể TextBox cũ)
[code language="xml"]
<TextBox x:Name="txtYear" Height="23" TextWrapping="Wrap" Tag="Year-Old"
<!--Xóa thuộc tính Text=" " ở đây-->
VerticalAlignment="Top" Padding="5,1,2,1" Style="{DynamicResource TxtStyleValidation}"
BorderBrush="#FF0630AE" Margin="0,3,0,0">
<!--Phần thêm vào-->
<TextBox.Text>
<Binding Path="YearOld" UpdateSourceTrigger="PropertyChanged" >
<Binding.ValidationRules>
<!--Giá trị Min,Max là một hằng số, giá trị của chúng không thể dùng Binding-->
<Rules:PersionalRules Min="18" Max="30"/>
</Binding.ValidationRules>
</Binding>
</TextBox.Text>
<!--Phần thêm vào-->
</TextBox>
[/code]
Kết quả như sau (SourceCode)
[caption id="" align="aligncenter" width="525"]
 Phạm Tuân[/caption]
Chúng ta đã hoàn thành hai vấn đề về Validation, chúc các bạn thành công!
Phạm Tuân
Bài viết này cho ta thấy làm thế nào để có thể sử dụng một ErrorTemplate và kích hoạt một Style để cung cấp thông tin phản hồi trực quan nhằm thông báo cho người dùng khi một giá trị không hợp lệ được nhập vào, dựa trên một quy tắc xác nhận nào đó.
Chúng ta sẽ làm một ví dụ như sau: Tôi có một lớp Persional chứa thông tin một người nào đó với hai thuộc tính là Name và YearOld, tôi sẽ Binding dữ liệu vào hai TextBox. Yêu cầu khi người dùng nhập tên và tuổi vào hai TextBox kia là tên không nhỏ hơn 2 kí tự hoặc rỗng, tuổi phải lớn hơn >= 18. Nếu nhập sai sẽ có ToolTip thông báo lỗi và chuyển màu TexBox.
Tôi tiến hành tạo Style cho TextBox với những yêu cầu sau:
- Có phần Header với dữ liệu được BinDing từ Tag ( là một property) của TextBox.
- Màu nền của Header trùng với màu viền của TextBox (mặc định là Blue)
- Trigger: Nếu sảy ra một Validation.HasError (=True) thì màu nền Header và viền TextBox chuyển sang Red và có sẽ có ToolTip thông báo lỗi cụ thể.
Tôi đặc style này vào phần Window.Resources như sau.
[code language="xml"]
<Window.Resources>
<SolidColorBrush x:Key="TextBox.Static.Border" Color="#FFABAdB3"/>
<SolidColorBrush x:Key="TextBox.MouseOver.Border" Color="#FF7EB4EA"/>
<SolidColorBrush x:Key="TextBox.Focus.Border" Color="#FF569DE5"/>
<Style x:Key="TxtStyleValidation" TargetType="{x:Type TextBox}">
<Setter Property="Background" Value="{DynamicResource {x:Static SystemColors.WindowBrushKey}}"/>
<Setter Property="BorderBrush" Value="{StaticResource TextBox.Static.Border}"/>
<Setter Property="Foreground" Value="{DynamicResource {x:Static SystemColors.ControlTextBrushKey}}"/>
<Setter Property="BorderThickness" Value="1"/>
<Setter Property="KeyboardNavigation.TabNavigation" Value="None"/>
<Setter Property="HorizontalContentAlignment" Value="Left"/>
<Setter Property="FocusVisualStyle" Value="{x:Null}"/>
<Setter Property="AllowDrop" Value="true"/>
<Setter Property="ScrollViewer.PanningMode" Value="VerticalFirst"/>
<Setter Property="Stylus.IsFlicksEnabled" Value="False"/>
<Setter Property="Template">
<Setter.Value>
<ControlTemplate TargetType="{x:Type TextBox}">
<Border x:Name="border" BorderBrush="{TemplateBinding BorderBrush}" BorderThickness="{TemplateBinding BorderThickness}" Background="{TemplateBinding Background}" SnapsToDevicePixels="True">
<Grid>
<Grid.ColumnDefinitions>
<ColumnDefinition Width="Auto"/>
<ColumnDefinition Width="*"/>
</Grid.ColumnDefinitions>
<Grid MinWidth="100" x:Name="grdHeader" Background="{TemplateBinding BorderBrush}">
<Label x:Name="lbHeader" Content="{TemplateBinding Tag}" Padding="5,0,5,2" VerticalContentAlignment="Center" Foreground="White" ></Label>
</Grid>
<ScrollViewer x:Name="PART_ContentHost" Focusable="false" HorizontalScrollBarVisibility="Hidden" VerticalScrollBarVisibility="Hidden" Grid.Column="1" VerticalContentAlignment="Center" Padding="5,2,2,1"/>
</Grid>
</Border>
<ControlTemplate.Triggers>
<Trigger Property="IsMouseOver" Value="true">
<Setter Property="BorderBrush" TargetName="border" Value="{StaticResource TextBox.MouseOver.Border}"/>
</Trigger>
<Trigger Property="IsKeyboardFocused" Value="true">
<Setter Property="BorderBrush" TargetName="border" Value="{StaticResource TextBox.Focus.Border}"/>
</Trigger>
<!-- Phần chính-->
<Trigger Property="Validation.HasError" Value="true">
<Setter Property="ToolTip"
Value="{Binding RelativeSource={x:Static RelativeSource.Self},
Path=(Validation.Errors)[0].ErrorContent}"/>
<Setter Property="Background" TargetName="grdHeader" Value="Red"/>
<Setter Property="BorderBrush" TargetName="border" Value="Red"/>
</Trigger>
<!-- Phần chính-->
</ControlTemplate.Triggers>
</ControlTemplate>
</Setter.Value>
</Setter>
<Style.Triggers>
<MultiTrigger>
<MultiTrigger.Conditions>
<Condition Property="IsInactiveSelectionHighlightEnabled" Value="true"/>
<Condition Property="IsSelectionActive" Value="false"/>
</MultiTrigger.Conditions>
<Setter Property="SelectionBrush" Value="{DynamicResource {x:Static SystemColors.InactiveSelectionHighlightBrushKey}}"/>
</MultiTrigger>
</Style.Triggers>
</Style>
</Window.Resources>
[/code]
Và Phần thể hiện nội dung chính được thiết kế như sau:
[code language="xml"]
<Window x:Class="Validation.MainWindow"
xmlns="http://schemas.microsoft.com/winfx/2006/xaml/presentation"
xmlns:x="http://schemas.microsoft.com/winfx/2006/xaml"
Title="MainWindow" Height="350" Width="525">
<!--Chèn phần style trên vào đây -->
<StackPanel x:Name="Stack" Margin="10">
<TextBox x:Name="txtName" Height="23" TextWrapping="Wrap"
Text="{Binding Name,UpdateSourceTrigger=PropertyChanged,ValidatesOnDataErrors=True}" Tag="My Name"
VerticalAlignment="Top" Padding="5,1,2,1" Style="{DynamicResource TxtStyleValidation}"
BorderBrush="#FF0630AE" Margin="0,3,0,0"/>
<TextBox x:Name="txtYear" Height="23" TextWrapping="Wrap"
Text="{Binding YearOld, UpdateSourceTrigger=PropertyChanged,ValidatesOnDataErrors=True}" Tag="Year-Old"
VerticalAlignment="Top" Padding="5,1,2,1" Style="{DynamicResource TxtStyleValidation}"
BorderBrush="#FF0630AE" Margin="0,3,0,0"/>
</StackPanel>
</Window>
[/code]
Kết quả cho style
[caption id="" align="aligncenter" width="525"]
 Phạm Tuân[/caption]
Chúng ta đến phần quan trọng nhất là khởi tạo lớp Persional
Chúng ta tạo lớp Persional và phải kế thừa từ hai interface sau IDataErrorInfo và INotifyPropertyChanged. Ta có hình hài lớp này như sau (Tham khảo INotifyPropertyChanged để hiểu hơn về method OnPropertyChanged)
[code language="csharp"]
class Personal : IDataErrorInfo,INotifyPropertyChanged
{
private string _name;
private int _yearold;
public int YearOld
{
set
{
if (value != _yearold)
{
_yearold = value;
}
}
get { return _yearold; }
}
public string Name
{
set
{
value = value.Trim();
if (value !=_name)
{
_name = value;
}
}
get { return _name; }
}
// IDataErrorInfo
public string Error
{
get { throw new NotImplementedException(); }
}
public string this[string columnName]
{
get { throw new NotImplementedException(); }
}
//INotifyPropertyChanged
public event PropertyChangedEventHandler PropertyChanged;
public void OnPropertyChanged(string property){}
}
[/code]
Hoàn thành lớp Persional như sau
[code language="csharp"]
class Personal:IDataErrorInfo,INotifyPropertyChanged
{
private string _name;
private int _yearold;
public int YearOld
{
set
{
if (value != _yearold)
{
_yearold = value;
OnPropertyChanged("YearOld");
}
}
get { return _yearold; }
}
public string Name
{
set
{
value = value.Trim();
if (value !=_name)
{
_name = value;
OnPropertyChanged("Name");
}
}
get { return _name; }
}
//IDataErrorInfo
public string Error
{
get { throw new NotImplementedException(); }
}
public string this[string columnName]
{
get
{
string result = String.Empty;
switch (columnName)
{
case "Name":
if (String.IsNullOrEmpty(Name) || Name.Length < 2)
{
result = "Lỗi nhập liệu: tên không chính xác";
}
break;
case "YearOld":
if (YearOld < 18)
{
result = "Lỗi nhập liệu: Tuổi quá nhỏ";
}
break;
}
return result;
}
}
// INotifyPropertyChanged
public event PropertyChangedEventHandler PropertyChanged;
public void OnPropertyChanged(string property)
{
if (PropertyChanged != null)
{
PropertyChanged.Invoke(this,new PropertyChangedEventArgs(property));
}
}
}
[/code]
Hoàn thành phần View và ViewModel xong ta tiến hành một bước đơn giản sau trước khi chạy thử ứng dụng
[code language="csharp"]
public MainWindow()
{
InitializeComponent();
Stack.DataContext = new Personal() { Name = "Phạm Tuân", YearOld = 21 };
}
[/code]
Kết quả như sau
[caption id="" align="aligncenter" width="525"]
Phạm Tuân[/caption]Các bạn có thể tham khảo SourceCode tại đây, Phần tiếp theo nói về ValidationRule.
Chúc các bạn thành công!
Tuân Phạm
Thứ Hai, 22 tháng 12, 2014
Hôm nay chúng ta sẽ tìm hiểu về cơ chế xử lý song song trong C# với Parallel Class. Nhiều máy tính cá nhân và máy trạm có hai hoặc bốn lõi (CPU) cho phép nhiều luồng xử lý (Thread) được thực hiện đồng thời. Máy tính trong tương lai gần dự kiến sẽ còn có nhiều hơn số lỗi hiện tại. Để tận dụng lợi thế của phần cứng của ngày hôm nay và ngày mai, bạn có thể phân phối công việc trên nhiều luồng xử lý trên nhiều lõi. Visual Studio 2010 và .NET Framework 4 hỗ trợ tăng cường cho lập trình song song bằng cách cung cấp một runtime mới, các loại thư viện lớp mới, và các công cụ chẩn đoán mới. Những tính năng đơn giản hóa phát triển song song để bạn có thể viết hiệu quả, khả năng mở rộng và đa dạng tiến trình song song.
* Khi Nào Nên Dùng Lớp Parallel
* Kiểm Tra Tốc Độ Của Foreach vs LinQ vs LinQasParallel
Hình minh họa dưới đây cung cấp một cái nhìn tổng quan cấp cao của kiến trúc lập trình song song trong .NET Framework 4
[caption id="" align="aligncenter" width="672"]
 Phạm Tuân[/caption]
Các bạn có thể tham khảo thêm chủ đề liên quan đến vấn đề này qua bản dưới.
| Technology | Description |
|---|---|
| Task Parallel Library (TPL) | Provides documentation for the System.Threading.Tasks.Parallel class, which includes parallel versions of For and ForEach loops, and also for theSystem.Threading.Tasks.Task class, which represents the preferred way to express asynchronous operations. |
| Parallel LINQ (PLINQ) | A parallel implementation of LINQ to Objects that significantly improves performance in many scenarios. |
| Data Structures for Parallel Programming | Provides links to documentation for thread-safe collection classes, lightweight synchronization types, and types for lazy initialization. |
| Parallel Diagnostic Tools | Provides links to documentation for Visual Studio debugger windows for tasks and parallel stacks, and the Concurrency Visualizer, which consists of a set of views in the Visual Studio Application Lifecycle Management Profiler that you can use to debug and to tune the performance of parallel code. |
| Custom Partitioners for PLINQ and TPL | Describes how partitioners work and how to configure the default partitioners or create a new partitioner. |
| Task Factories | Describes the role of the System.Threading.Tasks.TaskFactory class. |
| Task Schedulers | Describes how schedulers work and how the default schedulers may be configured. |
| Lambda Expressions in PLINQ and TPL | Provides a brief overview of lambda expressions in C# and Visual Basic, and shows how they are used in PLINQ and the Task Parallel Library. |
| For Further Reading (Parallel Programming) | Provides links to additional documentation and sample resources for parallel programming in the .NET Framework. |
| Advanced Reading for the .NET Framework | Top level node for advanced topics such as threading and parallel programming. |
Cách khai báo và sử dụng lớp Parallel trong C#.
[code language="csharp"]
//Cách dùng for bình thường ta vẫn hay dùng
int n = ...
for (int i = 0; i < n; i++)
{
// ...
}
//Cách dùng với lớp parallel
int n = ...
Parallel.For(0, n, i =>
{
// ...
});
//Hoặcvới một IEnumerable
IEnumerable<MyObject> myEnumerable = ...
Parallel.ForEach(myEnumerable, obj =>
{
// ...
});
[/code]
Vẫn có thể dùng với LINQ
[code language="csharp"]
IEnumerable<MyObject> source = ...
// LINQ
var query1 = from i in source select Normalize(i);
// PLINQ = parallel LINQ
var query2 = from i in source.AsParallel()
select Normalize(i);
//Hoặc
IEnumerable<MyObject> myEnumerable = ...
myEnumerable.AsParallel().ForAll(obj => DoWork(obj));
[/code]
Lợi ích trước mắt chúng ta có thể nhận thấy đó là tốc độ và thời gian được cải thiện đáng kể, hãy xem xét ví dụ sau đây.
[code language="csharp"]
class Program
{
//Tính tổng
static int SumDefault(int[] array)
{
return array.Sum();
}
//Tính tổng với Parallel
static int SumAsParallel(int[] array)
{
return array.AsParallel().Sum();
}
static void Main()
{
// Tạo mảng.
int[] array = Enumerable.Range(0, short.MaxValue).ToArray();
// Test methods.
Console.WriteLine("Result for Parallel: " + SumAsParallel(array));
Console.WriteLine("Result for None-Parallel: " + SumDefault(array));
const int m = 10000;
var s1 = Stopwatch.StartNew();
for (int i = 0; i < m; i++)
{
SumDefault(array);
}
s1.Stop();
var s2 = Stopwatch.StartNew();
for (int i = 0; i < m; i++)
{
SumAsParallel(array);
}
s2.Stop();
Console.WriteLine("\nTime for None-paralel: "
+ ((double)(s1.Elapsed.TotalMilliseconds * 1000000) / m).ToString("0.00 ns"));
Console.WriteLine("Time for Paralel: "
+ ((double)(s2.Elapsed.TotalMilliseconds * 1000000) / m).ToString("0.00 ns"));
Console.Read();
}
}
[/code]
Các bạn có thể tìm hiểu thêm về parallel thông qua cuốn sách này - Parallel Programming with Microsoft .NET
Chúc các bạn thành công!
Phạm Tuân
Chủ Nhật, 21 tháng 12, 2014
Delegate là một kiến thức căn bản cần nắm vững khi bạn làm việc với C#, .NET. Mặc dù bạn có thể tránh việc sử dụng delegate nhưng cuối cùng bạn vẫn phải công nhận rằng lập trình viên không thể không dùng delegate được. Delegate nói về mặt nào đó nó tương tự như con trỏ hàm trong C++, không khó hiểu cũng như không khó để áp dụng, nếu bạn dành một chút thời gian tìm hiểu.
Một delegate giống như một “người đại diện” hay “đại sứ”. Một delegate có thể được dùng để tạo một bao đóng (encapsulation) cho bất kì phương thức nào, miễn là nó phù hợp (kiểu trả về, tham số). Là một “đại sứ”, delegate có thể triệu gọi phương thức bất kì nơi nào: từ đối tượng này đến đối tượng kia, từ thread này sang thread kia,… Đây là đặc điểm chính của delegate, bạn sẽ cần nhớ lại điều này khi giải quyết các vấn đề thường gặp như truyền dữ liệu giữa hai Form, xử lý lỗi “Cross-thread operation not valid”, tạo event, …
Cách khai báo và sử dụng:
[code language="csharp"]
public delegate void Del(string message);
// Create a method for a delegate.
public static void DelegateMethod(string message)
{
System.Console.WriteLine(message);
}
// Instantiate the delegate.
Del handler = DelegateMethod;
// Call the delegate.
handler("Hello World");
[/code]
Bây giờ chúng ta sẽ sử dụng delegate để truyền dữ lệu giữa hai Form. Tôi có FormMain được xem là chính, chính form này sẽ mở FormChild, vấn đề làm sao để khi Click vào button trên formChild thì dữ liệu sẽ được gửi sang formMain và hiển thị lên textBox.
Cách làm là tại formChild ta định nghĩa một kiểu delegate với các kiểu dữ liệu phù hợp, trong class formChild khai báo thêm một biến(*) với kiểu delegate đã định nghĩa ở trên:
[code language="csharp"]
//Định nghĩa delegate
public delegate void DelSendMsg(string msg);
//khạ báo biến kiểu delegate
public DelSendMsg SendMsg;
public FormChild()
{
InitializeComponent();
}
private void BtnButton_OnClick(object sender, RoutedEventArgs e)
{
if (SendMsg != null)
{
// Thực thi hàm 'ShowMsg(string msg)' ở formMain
SendMsg.Invoke(TxTextBox.Text);
}
}
[/code]
Ở formMain khi new formChild() xong, tôi sẽ truyền vào cho formChild một phương thức của formMain thông qua biến (*) delegate ở formChild. Lưu ý tôi có hai Button dùng để Show formChild với cùng mục đích nhưng cách truyền con trỏ hàm khác nhau(tường minh và Lambda Expressions).
[code language="csharp"]
public FormMain()
{
InitializeComponent();
}
//Truyền con trỏ hàm tường minh
private void BtnButton_OnClick(object sender, RoutedEventArgs e)
{
FormChild child = new FormChild();
child.SendMsg = ShowMsg; //void ShowMsg(string msg)
child.Show();
}
//Hàm ủy nhiệm cho formChild
private void ShowMsg(string msg)
{
TxTextBox.Text = msg;
}
//Truyền con trỏ hàm với Lambda Expressions
private void BtnButton2_OnClick(object sender, RoutedEventArgs e)
{
FormChild child = new FormChild();
child.SendMsg = (msg) => TxTextBox.Text = msg;
child.Show();
}
[/code]
Vậy là khi "Show formChild", tại form này tôi nhập thông tin vào textBox và nhấn "Send to" thì lập tức textBox ở formMain sẽ thay đổi giá trị tương ứng. Kết quả:
[caption id="attachment_193" align="aligncenter" width="288"]
 Phạm Tuân[/caption]
Mời các bạn tham khảo SourceCode tại đây
Chúc các bạn thành công!
Phạm Tuân
Thứ Bảy, 20 tháng 12, 2014
Hôm nay tôi sẽ nói về một cách đơn giản để thêm một phương thức bất kỳ bên ngoài vào cách hành xử của đối tượng mà không hề ảnh hưởng đến code của class mô tả đối tượng đó.
Tôi sẽ đặc vấn đề ngắn gọn như sau, tôi có một đối tượng là Student, đối tượng này có hai thuộc tính Name, Index và không có phương thức hành xử nào. Giả sử tôi muốn in thông tin của từng học sinh với Name và Index tôi sẽ làm sao, chắc chắn sẽ thế này:
[code language="csharp"]
Console.WriteLine("Student #{0} Name = {1}", student.Index, student.Name);
[/code]
Như thế là quá đẹp rồi, và vấn đề là tôi có 10000 chổ trong ứng dụng của mình cần in thông tin như trên, và tôi nghĩ ra cách là viết một phương thức PrintInfo() cho class Student và mỗi lần muốn in thông tin thì gọi; xét về logic thì không chê được, nhưng chúng ta làm việc về mặt đối tượng thì hoàn toàn không phù hợp vì đối tượng Student không thể có cách hành xử là tự print thông tin chính mình(ví dụ khi đi mua vé xe), thế thì làm cách nào giải quyết, không lẽ phải viết 10000 dòng code print thông tin như trên. Để làm điều khó khăn đó chúng ta nghĩ ngay đến Extension Methods, cách thực hiện như sau.
Tôi có lớp Student
[code language="csharp"]
// Lớp Student
public class Student
{
public string Name { set; get; }
public int Index { set; get; }
}
[/code]
Tôi tạo lớp StudentExt - Extension Methods phải static, để ý từ khóa this trong đối số của hàm ToInfo, chú ý rằng hàm ToInfo không có đối số(tường minh) truyền vào khi sử dụng nhé, đối số ta đang thấy(this Student student) chỉ thể hiện là hàm này chỉ dùng cho đối tượng Student và "this Student student" chính là đối tượng gọi ToInfo().
[code language="csharp"]
// Lớp chứa Extension Methods
public static class StudentExt
{
// không có đối số tường minh
public static string ToInfo(this Student student)
{
return string.Format("Student #{0} Name: {1}", student.Index, student.Name);
}
// Extension Methods với một đối số
public static string ToInfo(this Student student, string txtfont)
{
return string.Format("{0} #{1} Name: {2}",txtfont, student.Index, student.Name);
}
}
[/code]
Chúng ta dùng nó như sau.
[code language="csharp"]
static void Main(string[] args)
{
var student0 = new Student(){Name = "Nguyen A",Index = 0};
var student1 = new Student(){Name = "Nguyen B",Index = 1};
Console.WriteLine(student0.ToInfo());
Console.WriteLine(student1.ToInfo("Best student"));
Console.ReadKey();
}
[/code]
Kết quả:
[caption id="attachment_182" align="aligncenter" width="300"]
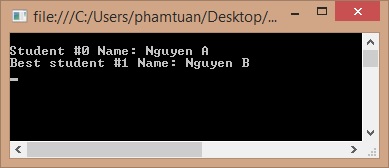 Phạm Tuân[/caption]
Chúc các bạn thành công!
Phạm Tuân
Ở bài này tôi sẽ hướng dẫn các bạn một kỹ thuật để duyệt một Object theo kiểu duyệt Aray hay List. Chúng ta đã quá quen với việc duyệt một List theo kiểu thế này ' var result = myList[0].Value; ' vậy có bao giờ các bạn đặc vấn đề rằng sẽ duyệt các phần tử được chứa trong một đối tượng của mình theo kiểu trên, hôm nay chúng ta sẽ tìm hiểu.
Vấn đề tôi đặc ra là tôi có một Class mô tả một lớp học ClassXYZ, trong lớp học này tôi sẽ có một kiểu dữ liệu là List để giữ danh sách thông tin các học sinh (Students) trong lớp này. Vậy để lấy thông tin một học sinh nào đó trong lớp trên tôi sẽ phải thông qua một public property là Studentlist của đối tượng ClassXYZ, tôi tự hỏi có cách nào tôi không cần thông qua property này không. Tôi sẽ mô tả điều này theo hai cách nghĩ là truyền thống và kỹ thuật indexer như sau.
Cách làm bình thường:
[code language="csharp"]
class Program
{
static void Main(string[] args)
{
var classXYZ = new ClassXYZ();
classXYZ.AddStudent(new Student(){Name = "Nguyen A",Stt = 0});
classXYZ.AddStudent(new Student() { Name = "Nguyen B",Stt = 1 });
Console.WriteLine("Student #{0} Name = {1}", 0, classXYZ.StudenList[0].Name);
Console.WriteLine("Student #{0} Name = {1}", 1, classXYZ.StudenList[1].Name);
Console.ReadKey();
}
}
//----------------------------
public class ClassXYZ
{
public List<Student> StudenList
{
private set;
get;
}
public ClassXYZ()
{
StudenList = new List<Student>();
}
public void AddStudent(Student student)
{
StudenList.Add(student);
}
}
//----------------------------
public class Student
{
public string Name { set; get; }
public int Index { set; get; }
}
[/code]
Kỹ thuật indexer
ở cách làm này tôi sẽ thêm vào ClassXYZ một property mà tên property này là từ khóa this, các bạn sẽ thấy sự thay đổi cách dùng ở hàm Main.
[code language="csharp"]
// Before
Console.WriteLine("Student #{0} Name = {1}", 0, classXYZ.StudenList[0].Name);
Console.WriteLine("Student #{0} Name = {1}", 1, classXYZ.StudenList[1].Name);
// After
Console.WriteLine("Student #{0} Name = {1}", 0, classXYZ[0].Name);
Console.WriteLine("Student #{0} Name = {1}", 1, classXYZ[1].Name);
[/code]
[code language="csharp"]
class Program
{
static void Main(string[] args)
{
var classXYZ = new ClassXYZ();
classXYZ.AddStudent(new Student(){Name = "Nguyen A",Stt = 0});
classXYZ.AddStudent(new Student() { Name = "Nguyen B",Stt = 1 });
Console.WriteLine("Student #{0} Name = {1}", 0, classXYZ[0].Name);
Console.WriteLine("Student #{0} Name = {1}", 1, classXYZ[1].Name);
Console.ReadKey();
}
}
//----------------------------
public class ClassXYZ
{
public List<Student> StudenList
{
private set;
get;
}
// Add it
public Student this[int index]
{
get
{
return StudenList[index];
}
set
{
StudenList[index] = value;
}
}
public ClassXYZ()
{
StudenList = new List<Student>();
}
public void AddStudent(Student student)
{
StudenList.Add(student);
}
}
[/code]
Hai cách trên đều cho cùng một kết quả:
[caption id="attachment_173" align="aligncenter" width="300"]
 Phạm Tuân[/caption]
Chúc các bạn thành công!
Phạm Tuân
Thứ Hai, 15 tháng 12, 2014

Hôm nay chúng ta sẽ tìm hiểu về cách thức để chuyển đổi một kiểu dữ liệu bất kỳ từ sourceValue thành kiểu dữ liệu mà Control hiện tại có thể hiểu. Tình huống chúng ta có thể gặp là làm sao chuyển một kiểu Boolean thành kiểu Visibility để hiện hoặc ẩn Control.
Để làm điều này chúng ta cần tạo một class Converter và class này kế thừa từ interface IValueConverter, interface này có hai thành viên:
Convert: Chuyển đổi từ sourceValue thành kiểu trên Control nhận value
ConvertBack: Chuyển đổi từ Control binding sang kiểu dữ liệu nguồn
[code language="csharp"]
public class Converter: IValueConverter
{
public object Convert(object value, Type targetType, object parameter, System.Globalization.CultureInfo culture)
{
throw new NotImplementedException();
}
public object ConvertBack(object value, Type targetType, object parameter, System.Globalization.CultureInfo culture)
{
throw new NotImplementedException();
}
}
[/code]
Chúng ta sẽ Implement hai phương thức thành viên trên như sau:
[code language="csharp"]
public object Convert(object value, Type targetType, object parameter, System.Globalization.CultureInfo culture)
{
var bValue = (bool)value;
if (bValue)
return Visibility.Visible;
return Visibility.Collapsed;
}
public object ConvertBack(object value, Type targetType, object parameter, System.Globalization.CultureInfo culture)
{
var visibility = (Visibility)value;
if (visibility == Visibility.Visible)
return true;
return false;
}
[/code]
Đến đây chúng ta đã xong phần quang trọng nhất, vậy để dùng nó khi dữ liệu được Binding thế nào, trước tiên ta phải khai báo namespace chứa class trên.
[code language="xml"]
xmlns:local="clr-namespace:DataBinding"
[/code]
Và define class Converter ở Resources với khóa là x:Key="BooleanConvert"
[code language="xml"]
<Window.Resources>
<local:Converter x:Key="BooleanConvert" />
</Window.Resources>
[/code]
Việc tiếp theo khá đơn giản, tôi tạo một CheckBox với mục đích để ẩn hoặc hiện một Rectangle, dĩ nhiên tôi sẽ Binding thuộc tính Visibility của Rectangle với thuộc tính IsChecked của CheckBox. Nếu không dùng Converter thì việc Binding này sẽ không mang lại kết quả như mong đợi. Sau đây thôi sẽ sử dụng Convert trong code XAML:
[code language="xml"]
<StackPanel Margin="30">
<CheckBox x:Name="checkBox" Margin="10" Content="Show Rectangle" IsChecked="True"></CheckBox>
<Rectangle Fill="#FF158B0A" Height="200" RadiusY="43" RadiusX="43"
UpdateSourceTrigger=PropertyChanged,Converter='{StaticResource BooleanConvert}'}"/>
</StackPanel>
[/code]
Hoàn chỉnh XAML sẽ như sau:
[code language="xml"]
<Window
xmlns="http://schemas.microsoft.com/winfx/2006/xaml/presentation"
xmlns:x="http://schemas.microsoft.com/winfx/2006/xaml"
xmlns:local="clr-namespace:DataBinding"
xmlns:d="http://schemas.microsoft.com/expression/blend/2008" xmlns:mc="http://schemas.openxmlformats.org/markup-compatibility/2006" mc:Ignorable="d" x:Class="DataBinding.MainWindow"
Title="MainWindow" Height="350" Width="525">
<Window.Resources>
<local:Converter x:Key="BooleanConvert" />
</Window.Resources>
<StackPanel Margin="30">
<CheckBox x:Name="checkBox" Margin="10" Content="Show Rectangle" IsChecked="True"></CheckBox>
<Rectangle Fill="#FF158B0A" Height="200" RadiusY="43" RadiusX="43"
Visibility="{Binding IsChecked, ElementName=checkBox, UpdateSourceTrigger=PropertyChanged,Converter='{StaticResource BooleanConvert}'}"/>
</StackPanel>
</Window>
[/code]
Ta được kết quả:

Chúc các bạn thành công: Download source
Chủ Nhật, 14 tháng 12, 2014
Ở bài trước chúng ta đã hiểu cơ bản về DataBinding - cơ chế liên kết dữ liệu giữa các thành phần Data và UI; chúng ta sẽ tiếp tục nói về DataBinding ở bài này với một đăc tính khác. Nói về WPF chúng ta sẽ phải sử dụng mô hình MVVM nếu muốn khai thác tối đa hiệu quả của công nghệ này mang lại nhưng chúng ta sẽ hiểu về MVVM ở một bài khác, sở dĩ tôi nói về điều này vì trong bài viết này chúng ta sẽ có một vài thuật ngữ liên quan(ViewModel).
Hiểu nôm na MVVM là mô hình tương tác giữa UI và phần logic, phần logic là một dạng dữ liệu được cung cấp cho thuộc tính DataContent cho mỗi Control và việc chúng ta sẽ làm là binding dữ liệu từ UI vào DataContent(hay gọi là ViewModel trong MVVM)
[code language="csharp"]btnSave.DataContent = new ViewModel();[/code]
Dưới đây là một đoạn XAML thể hiện việc UI sẽ binding dữ liệu để lấy thuộc tính NAME từ ViewModel, dữ liệu sẽ được cập nhật hai chiều và tiến hành cập nhập khi nào thì thuộc tính UpdateSourceTrigger sẽ quy định; ngoài ra StringFormat cũng là một thuộc tính cần lưu ý nhưng khá đơn giản - nó giống StringFomart ta vẫn hay dùng trong C#.
[code language="xml"]
<TextBox Text="{Binding Name,Mode=TwoWay,UpdateSourceTrigger=PropertyChanged,StringFormat='Name: {0}'}" Margin="0,5,0,0"></TextBox>
[/code]
UpdateSourceTrigger có bốn giá trị như sau: PropertyChanged,LostFocus,Explicit,Default
| PropertyChanged | Cập nhật khi có sự thay đổi value, đối với TextBox thì mỗi kí tự bạn nhập là một lần update vào Source, chúng ta sẽ tập trung vào phần này |
| LostFocus | Chỉ cập nhật khi Control đó bị mất Focus |
| Explicit | Chỉ cập nhật khi gọi binding.UpdateSource(); thường sẽ xử lý với các sự liện khác |
| Default | Dĩ nhiên nó là default và tương tự PropertyChanged |
INotifyPropertyChanged là một Interface mà một lớp ViewModel sẽ phải implement, interface này có duy nhất một thành viên sau
[code language="csharp"]public event PropertyChangedEventHandler PropertyChanged;[/code]
Đây là một event sẽ được gọi khi cần để báo rằng giá trị của một thuộc tính mà ViewModel chứa bị thay đổi. Chúng ta tận dụng điều này để làm gì, vâng! để thông báo cho UI rằng tôi đã bị thay đổi giá trị, hãy cập nhật giá trị ấy cho bạn đi.
Chúng ta sẽ làm một ví dự minh họa như sau: Tôi tạo một lớp ViewModel cho cho một đối tượng UI đại diện cho một con người (một Grid chứa các TextBox thể hiện thông tin một người):
code XAML
[code language="xml"]
<StackPanel x:Name="stpPer" Margin="30" VerticalAlignment="Top">
<TextBox Text="{Binding Name,Mode=TwoWay,UpdateSourceTrigger=PropertyChanged,StringFormat='Name: {0}'}" Margin="0,5,0,0"></TextBox>
<TextBox Text="{Binding Height,Mode=TwoWay,UpdateSourceTrigger=PropertyChanged,StringFormat='Height: {0}'}" Margin="0,5,0,0"></TextBox>
<TextBox Text="{Binding Width,Mode=TwoWay,UpdateSourceTrigger=PropertyChanged,StringFormat='Width: {0}'}" Margin="0,5,0,0"></TextBox>
</StackPanel>
[/code]
Tạo ViewModel
Ở đây tôi sẽ tạo một lớp abstract là ViewModelBase kế thừa interface INotifyPropertyChanged và implement thành viên của nó. Tôi tạo phương thức NotifyPropertyChanged("propertyName") để xử lý việc thay đổi value của Property(với propertyName là tên của Property bị Changed value.
[code language="csharp"]
public abstract class ViewModelBase : INotifyPropertyChanged
{
public event PropertyChangedEventHandler PropertyChanged;
protected void NotifyPropertyChanged([CallerMemberName] String propertyName = "")
{
if (PropertyChanged != null)
{
PropertyChanged(this, new PropertyChangedEventArgs(propertyName));
}
}
}
[/code]
Tiếp sau tôi tạo lớp Persion kế thừa từ ViewModelBase với các thuộc tính Name,Height,Width để binding. Khi các thuộc tính nàu thay đổi value tôi sẽ gọi phương thức NotifyPropertyChanged("propertyName") để thông báo rằng propertyName này đã bị thay đổi giá trị và UI sẽ nhận được thông báo này nếu nó có đăng ký UpdateSourceTrigger=PropertyChanged.
[code language="csharp"]
public class Persion : ViewModelBase
{
public string Name
{
set
{
_name = value;
NotifyPropertyChanged("Name");
}
get { return _name; }
}
public string Height
{
set
{
_hieght = value;
NotifyPropertyChanged("Height");
}
get { return _hieght; }
}
public string Width
{
set
{
_width = value;
NotifyPropertyChanged("Widght");
}
get { return _width; }
}
private string _name;
private string _hieght;
private string _width;
}
[/code]
Code behind
[code language="csharp"]
public MainWindow()
{
InitializeComponent();
stpPer.DataContext = new Persion(){Height = "1m7",Name = "TuanPham",Width = "100,70,90"};
}
[/code]
Tôi lại thêm vào giao diện một TextBox và hai Button với mục đính thay đổi giá trị Name trong ViewModel xem trên UI có đổi không vaf show giá trị trong ViewModel khi changed giá trị trên TextBox name
[code language="xml"]
<Grid Margin="30">
<StackPanel x:Name="stpPer" VerticalAlignment="Top">
<TextBox Text="{Binding Name, Mode=TwoWay, StringFormat=Name: \{0\}, UpdateSourceTrigger=Default}" Margin="0,5,0,0"/>
<TextBox Text="{Binding Height, Mode=TwoWay, StringFormat=Height: \{0\}, UpdateSourceTrigger=PropertyChanged}" Margin="0,5,0,0"/>
<TextBox Text="{Binding Width, Mode=TwoWay, StringFormat=Width: \{0\}, UpdateSourceTrigger=PropertyChanged}" Margin="0,5,0,0"/>
</StackPanel>
<StackPanel Margin="0,0,0,20" Orientation="Vertical" VerticalAlignment="Bottom" HorizontalAlignment="Center">
<TextBox x:Name="txtChange" Height="23" TextWrapping="Wrap" Text="Please give me your name"/>
<Button x:Name="btnChange" Content="Change" HorizontalAlignment="Center"
Click="BtnChange_OnClick"
VerticalAlignment="Bottom" Width="75" Margin="0,10,0,0"/>
<Button x:Name="btnShow" Content="Show" HorizontalAlignment="Center"
Click="BtnShow_OnClick"
VerticalAlignment="Bottom" Width="75" Margin="0,10,0,0"/>
</StackPanel>
</Grid>
[/code]
Code behind
[code language="csharp"]
public MainWindow()
{
InitializeComponent();
stpPer.DataContext = new Persion(){Height = "1m7",Name = "TuanPham",Width = "100,70,90"};
}
private void BtnChange_OnClick(object sender, RoutedEventArgs e)
{
(stpPer.DataContext as Persion).Name = txtChange.Text;
}
private void BtnShow_OnClick(object sender, RoutedEventArgs e)
{
MessageBox.Show((stpPer.DataContext as Persion).Name);
}
[/code]
Kết quả:


Chúc các bạn thành công: download source
Đăng ký:
Nhận xét (Atom)